
假如使用DHCP, Zebra打印服务器将自动获取一个IP地址。为了验证打印服务器是否通过DHCP被分配了一个IP地址,可以通过按一下测试按钮后打印出打印服务器配置标签来检查。
有3种基本方法用来设置分配ZebraNet打印服务器的IP地址:
要求:
注意:固件firmware版本为V60.13.x的打印机将不辨识10/100打印服务器直到一个有效的网络连接出现。
过程:
(注意:这个设置例子为使用了XiIII打印机,你的打印机的按钮标签或许不一样)
1. 打开打印机电源,等到打印机完成开机自检。
2. 在打印机前控制面板中,按ETUP/EXIT键。
3. 按PREVIOUS键直到网络设置菜单项出现。
4. 你可以编辑设置以下网络参数使得打印服务器可以接入到你的网络环境中。
Note: 修改打印机的任何这些设置,打印机都要求输入密码,缺省的密码为1234。
要求:
在能够TELNET到打印服务器和设置打印服务器之前,必须首先给打印服务器临时分配一个IP地址,有两种最简单的方法是增加一个静态路由Route或捡拾Gleaning。 假如你刚把打印服务器恢复到出厂设置defaulted ,此时使用捡拾过程IP地址为0.0.0.0,假如在2分钟内打印服务器没有收到一个IP地址,则打印服务器使用静态路由过程将默认IP地址到192.168.254.254。打印服务器ZebraNet II固件firmware版本早于7.0的将默认IP地址到198.102.102.254。
捡拾Gleaning
arp -s " 打印服务器的临时IP地址" "MAC地址(打印服务器的硬件地址)"
举例:
arp -s 10.3.50.59 00-40-68-1D-B9-86
静态路由Static Route
要求:
ZebraNet Bridge Enterprise can also be used in the same manner as ZebraNet View to adding the IP address. Refer to ZebraNet Bridge Enterprise's User Guide for complete details.
If this is the first time you are running ZebraNet View click here for information on how to setup the program. If you have already setup your view, continue with this document for information on how to set an IP address.
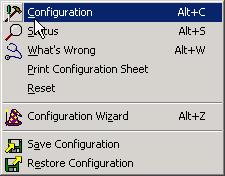
1. Open the ZebraNet View and select the printer you wish to configure from the list. Right click on it and choose configure. Alternatively you may simply highlight the printer and hit ALT-C.
2. If the Print Server does not yet have an IP address other than 0.0.0.0, you will be prompted to enter only the IP Address.
3. You may see the following error after hitting OK. Just click past it.
4. Set your IP information and hit OK.
Note: Sometimes ZebraNet View will lock up while retrieving configuration information after you select Configuration or Alt C. A work around for this is to Select Status or Alt S before trying to access the configuration menu. After the Status is displayed, just click Close and try Configuration or Alt C again.